 Getting Started
Getting Started
Getting Started
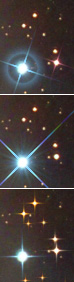
The StarSpikes Pro 4 plug-in analyzes* the content of your image to determine where the stars are. It classifies their brightnesses and colors, displays a preview image, then allows you to manipulate settings to control the effects.
The choices you make by changing the settings and using the tools determine the appearance of the effects and which stars they are drawn on. You will see the preview image update immediately upon making any changes. When you've got the effects looking the way you like, press the [ OK ] button to commit your changes back to your image in your editor.
See the Advanced Usage section for more information on ways to use the plug-in.
 Getting Help
At any time if you need help press the F1 key for help on the current control or click the Help icon. Look through the Contents, click the links in the topics, or simply Search for help.
* When the Highlight Analysis configuration option is set to Automatic Analysis and the plug-in is started in the Basic Controls mode with the Quantity set to 0, the analysis of the image is deferred until such time as the Quantity control is moved off of 0.
If the Highlight Analysis configuration option is set to Manual Analysis, the Quantity control operates in its normal manner and no analysis will be performed unless you click on the [ Analyze ] button.