You wish to create a Action which contains manual edits using the Show Tool,
Hide Tool, and/or Edit Effects Tool. In
this case, you could press the [ Analyze ] button, adjust the appearance
of the effects that were found automatically, and add additional effects or remove existing effects as desired. When
executed, the Action will always produce the effects exactly as you have specified.
Photoshop supports the inclusion of edits done with the Hide, Show, and Edit tools in an Action or Smart Filter but
not all image editors can do this. If your image editor lacks this support, edits done with the Hide, Show, and Edit tools
while recording an Action or Smart Filter will not appear in the image when the Action or Smart Filter is executed.
The above approach can also be useful when StarSpikes Pro 4 is a
member of a Smart Filter stack, particularly if the plug-in appears in the stack more than once. You could, for example,
have the first plug-in analyze the image automatically to generate effects and the second plug-in
overlay the image with a number of fixed effects.
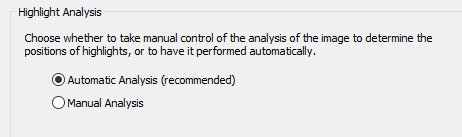 Configure Highlight Analysis