Advanced Usage

As described in the Getting Started section, StarSpikes Pro 4 can process your image pixels directly, adding its effects to your image. However, here are some suggestions for other ways you can use the plug-in to achieve additional creative control.


Advanced Editing Mode Advanced Editing Mode

If your effects still don't look quite the way you would like them to look, try switching to the Advanced editing mode. Selecting Advanced mode will give you control of every aspect of your effects. See Advanced Controls for more information about this powerful feature.


Edit Effects Tool Effects Editing

Don't have a star where you want one? The color of one or more of your effects just isn't quite right?. Take a look at our Edit Effects Tool. It gives you fine control over individual stars and effects.


Recording and Playing Back Actions

StarSpikes Pro 4 supports the recording and playback of Photoshop Actions. Just run the plug-in as you would any other function during action recording, and all parameters will be recorded and can be played back.

Photoshop supports the inclusion of edits done with the Hide, Show, and Edit tools in an Action or Smart Filter but not all image editors can do this. If your image editor lacks this support, edits done with the Hide, Show, and Edit tools while recording an Action or Smart Filter will not appear in the image when the Action or Smart Filter is executed.


Generate effects on a layer by themselves Layered Effects

Assuming you're using an editor such as Photoshop that provides multi-layered documents, one way to increase the flexibility of what you can do with the results StarSpikes Pro 4 generates is to use the Effects Only feature to generate just the effects alone into a separate layer in your document. To do this:

  • Open your image in Photoshop.
  • Duplicate your image layer as a separate layer above the original, naming it e.g., "Effects".
  • Run the plug-in, get your effects looking the way you like, and check the [ ] Effects Only checkbox.
  • Complete the plug-in by pressing the [ OK ] button.
  • In your editor, set the layer blending mode to something like Screen or Linear Dodge.

After doing this the results from the plug-in will brighten the original image, combining for spectacular looking results. But the key is that you can now manipulate the "Effects" layer separately by using other operations on just that layer, such as Curves, Levels, color operations, or anything else you find gives you the results you desire.


The Photoshop Layers panel showing StarSpikes Pro 4 as a Smart Filter 
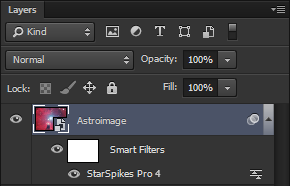
Using the plug-in as a Smart Filter in Photoshop

StarSpikes Pro 4 can also be used as a Photoshop Smart Filter, in which it can be stacked with other filters over your image and run "non-destructively" on your image pixels. To use the plug-in as a Smart Filter:

  • Open your image in Photoshop.
  • In the menus, choose Filter - Convert for Smart Filters.
  • Now run StarSpikes Pro 4 and get the effects looking as you like.
  • Complete the plug-in by pressing the [ OK ] button.
  • You will see an entry in the Photoshop Layers panel indicating StarSpikes Pro 4 is now being applied in your Smart Filters stack, and you will see the effects on the document.
  • At any time you wish to change the parameters to adjust the results, double-click the StarSpikes Pro 4 entry in the Layers panel.

This technique gives you the ability to alter your image without having had the effects applied, and Photoshop will automatically re-apply them (as it does with all filters in a Smart Filter stack). You can also use layer masking to restrict or reduce the brightness of the results.


If you get stuck or simply want to ask a question, please feel free to contact us at Support@ProDigitalSoftware.com - don't worry, we're here to help!