 Highlight Analysis Highlight Analysis
By default, StarFilter Pro 4 will analyze your image to locate any
highlights that may be present. It will also determine their colors and relative brightnesses. The results of this
highlight analysis are used to make it as easy as possible to apply effects to your image.
In some cases, however, it may be necessary or desirable for an advanced user to take control of this analysis
to determine when or if it should be performed. StarFilter Pro 4
provides a number of controls to accomplish this.
-
In the Preferences Dialog, the Highlight Analysis
option selections allow you to select whether highlight analysis is performed automatically (the default) or must be performed manually by
you.
-
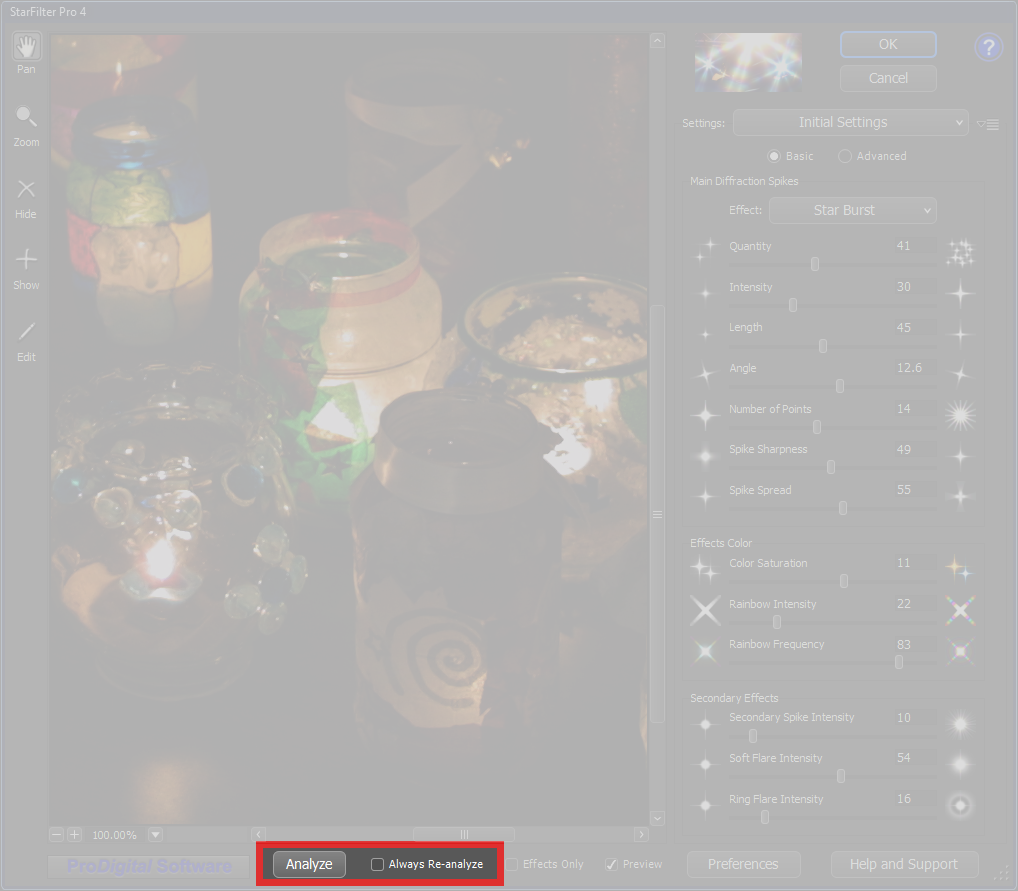
The [ Analyze ] button on the
Main Dialog, if present, allows you to cause a
highlight analysis to be performed immediately if one has not already been performed.
-
The [ ] Always Re‑Analyze checkbox on the
Main Dialog, if present, allows you to specify how often highlight analysis
will be performed during certain scripted operations such as Actions or Smart Filtering.
Note that the [ Analyze ] button and the
[ ] Always Re‑Analyze checkbox will not always be present. See the
descriptions of the individual controls to learn when these buttons are available.
|

 Analyze Button
The [ Analyze ] button can be used to initiate a highlight analysis of the image. The button
will be disabled (grayed out) if a highlight analysis has already been performed on the image since it is
normally not necessary to do more than once.
The image will be analyzed to determine the positions, colors and brightnesses of existing highlights.
Any manual edits you have made using the Show Tool, the
Hide Tool, and/or the Edit Effects Tool
will be retained.
Configured For Automatic Analysis
When the plug-in is configured for Automatic Analysis in the Highlight Analysis
section of the Preferences Dialog, the Analyze Button will not normally be displayed
since the plug-in will do a highlight analysis as needed. However, the Analyze Button will be displayed when editing an Action
or Smart Filter settings to give you maximum control.
Configured For Manual Analysis
When the plug-in is configured for Manual Analysis in the Highlight Analysis
section of the Preferences Dialog this button will always be present on the
Main Dialog and no automatic highlight analysis will be performed.
This can be useful if you only want to add a few effects manually with the Effects Editor since it saves
the time required to do a highlight analysis.
 Always Re-Analyze Checkbox
This checkbox will be displayed whenever you are editing settings for an Action or Smart Filter.
When the [ ] Always Re‑Analyze checkbox is checked, the plug-in will perform a highlight analysis every time it
is run (for example in re-rendering its effects as part of a stack of Smart Filters). If unchecked, highlight analysis will only be
performed under your control when the Action or Smart Filter is created or edited, and the information from the analysis will be retained
for subsequent runs, saving time and ensuring more consistent results.
Checking the [ ] Always Re‑Analyze checkbox while editing an Action or Smart Filter will cause an immediate
highlight analysis if one has not already been performed.
Configured For Automatic Analysis
By default, when the plug-in is configured for Automatic Analysis
in the Highlight Analysis section of the Preferences Dialog
this box will be checked, to cause a highlight analysis every time the Action or Smart Filter is executed.
Configured For Manual Analysis
By default, when the plug-in is configured for Manual Analysis in the
Highlight Analysis section of the Preferences Dialog
this box will not be checked, to prevent a highlight analysis from being performed every time the Action or Smart Filter is executed.